Setting up CalDAV and CardDAV with Daylite

To sync contacts and events to Calendar and Contacts, both on OS X and iOS devices, Daylite 4 and above now uses CalDAV and CardDAV. Syncing to local accounts is no longer supported, since Apple has moved away from Sync Services.
Setting up CalDAV and CardDAV accounts has proven to be difficult for many people, though, and these instructions are meant to ease you through the process.
Get your Daylite Server address
Go to the Network pane of Daylite Server Admin and get the Local address, which is the same address as you’ll find in the OS X Sharing preference pane. Unlike Daylite for iOS, your CalDAV and CardDAV accounts can’t fall back to a second address if the first one fails. And on a local network, unless you have a router that allows NAT Loopback (many don’t) or you have an internal DNS server, the Public address will be unreachable—and you will be unable to set up CalDAV and CardDAV accounts.
If you’re going to be using the OS X version of Daylite predominately while off the local (to Daylite Server) network, then by all means use the Public address (and do the setup while off the network). But local machines should use the Local address.
For iOS, you may be think that you need to use the Public address; after all, you use those devices remotely, right? Think about this, though: who is making changes to the database other than you while you are working remotely? If the answer is “no one,” then use the Local address. If you need to have changes pushed to you while you’re working remotely—in addition to what you get in Daylite for iOS—then use the Public address.
In either case, remember this: if you use the Local address, your CalDAV and CardDAV accounts won’t sync while you’re off the local network; if you use the Public address, the accounts won’t sync while on the local network (except in the unusual cases described above).
A final note before you begin: OS X and iOS are unforgiving of mistakes. If you make a mistake or feel you need to make a change, delete the account before beginning again.
Choosing a port
Normally you’d want to use a secure connection when sending your username and password. However, due to a bug in iOS 6 and above (no fix in 3+ years?), it seems impossible to use Daylite’s SSL port 6185. For iOS, then, use the non-SSL port 6188. For OS X, you should be able to reliably use port 6185; however, use https:// instead of http:// when using SSL.
Creating a Daylite CardDAV account in OS X Contacts (10.8+) or Address Book (10.7)
- Go to Contacts > Preferences > Accounts
- Click “+”
- Fill in the following information:
- Account type: CardDAV (for 10.9 and above, choose Other contacts account… and click Continue, make sure CardDAV is selected)
- User name: your Daylite username
- Password: your Daylite password
- Server address: Get your server address and append port 6188 so that the full server address looks similar to http://example.local:6188
- Click “Create”
- Edit the account and change the Description to “Daylite”
Creating a Daylite CalDAV account in OS X Calendar (10.8+) or iCal (10.7)
- Go to Calendar > Preferences > Accounts
- Click “+”
- Fill in the following information:
- Account Type: CalDAV (for 10.9+, choose Add CalDAV Account… and click Continue, choose Manual on the next pane)
- User Name: your Daylite username
- Password: your Daylite password
- Server address: Get your server address and append port 6188 so that the full server address looks similar to http://example.local:6188
- Click “Create”
- Edit the account and change the Description to “Daylite”
Creating a Daylite CalDAV account in BusyCal
For BusyCal 2
- Go to BusyCal > Preferences > Accounts
- Click “+”
- Select “CalDAV” and fill in the following information:
- User Name: your Daylite username
- Password: your Daylite password
- Server address: Get your server address and append port 6188 so that the full server address looks similar to example.local:6188—no “http://” prefix!
- Click “OK”
For BusyCal 1.6.3+
- Go to Calendar > Connect to iCloud/CalDAV Server
- Fill in the following information:
- Calendar server: CalDAV
- Login: your Daylite username
- Password: your Daylite password
- Server address: Get your server address and append port 6188 so that the full server address looks similar to example.local:6188—no “http://” prefix!
- Click “OK”
Creating a Daylite CalDAV account in Spotlife 1.0
(These instructions are not necessary for Spotlife 2.0—the app will automatically pick up your account.)
- Go to Spotlife > Preferences > Accounts
- Click “+”
- Select CalDAV and fill in the following information:
- Description: Daylite
- Server address: Get your server address (above) and the server path (from iCal) and append port 6188 and the server path so that the full server address looks similar to http://example.local:6188/principals/2000/
- User name: your Daylite username
- Password: your Daylite password
- Click “OK”
Spotlife will warn you that you are making an insecure connection. Click “Continue”
Creating a Daylite CardDAV account in Contacts (iOS)
- Go to Settings > Mail, Contacts, Calendars > Add Account… > Other
- Select Contacts > Add CardDAV Account and fill in the following information:
- Server: Get your server address (above) and append port 6188 so that the full server address looks similar to example.local:6188—no “http://” prefix!
- User name: your Daylite username
- Password: your Daylite password
- Description: Daylite
- Tap “Next”
iOS will attempt the connection using SSL—after a while the connection will fail:
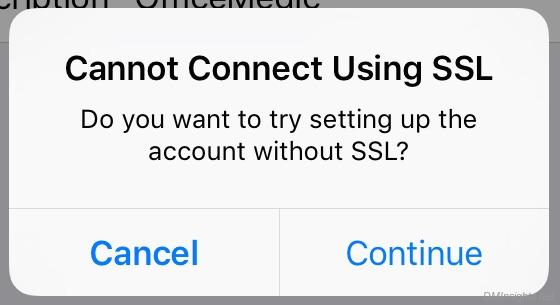
No problem: just click “Continue” and iOS will now use the necessary protocol and create the account.
Creating a Daylite CalDAV account in Calendar (iOS)
(Oddly, this is much easier than creating a CardDAV account)
- Go to Settings > Mail, Contacts, Calendars > Add Account… > Other
- Select Calendars > Add CalDAV Account and fill in the following information:
- Server: Get your server address and append port 6188 so that the full server address looks similar to http://example.local:6188
- User name: your Daylite username
- Password: your Daylite password
- Description: Daylite
- Tap “Next”
Updated 2/19/2016 to reflect current best practices.